Collect card details and payments for your orders quickly, simply, and securely with multiple payment methods and terms.
Let’s look at these one by one.
When taking an order, you will see the option “Payment method” as a line item on your screen:
Click on the “Add” button next to it. You will see this dialog box:
Click “Add card,” and you will see this dialog box where you can enter the customer’s card information.
Click “Add card.” This card will now be assigned to this customer. Whenever you take an order for this customer, this card will be visible as an option.
Click “Done.”
This was the process of card collection or tokenization (because card information is stored as tokens to ensure security.)
Once you have added a card, click “Submit Order” on this screen:
Once you click “Submit order,” you will see this screen:
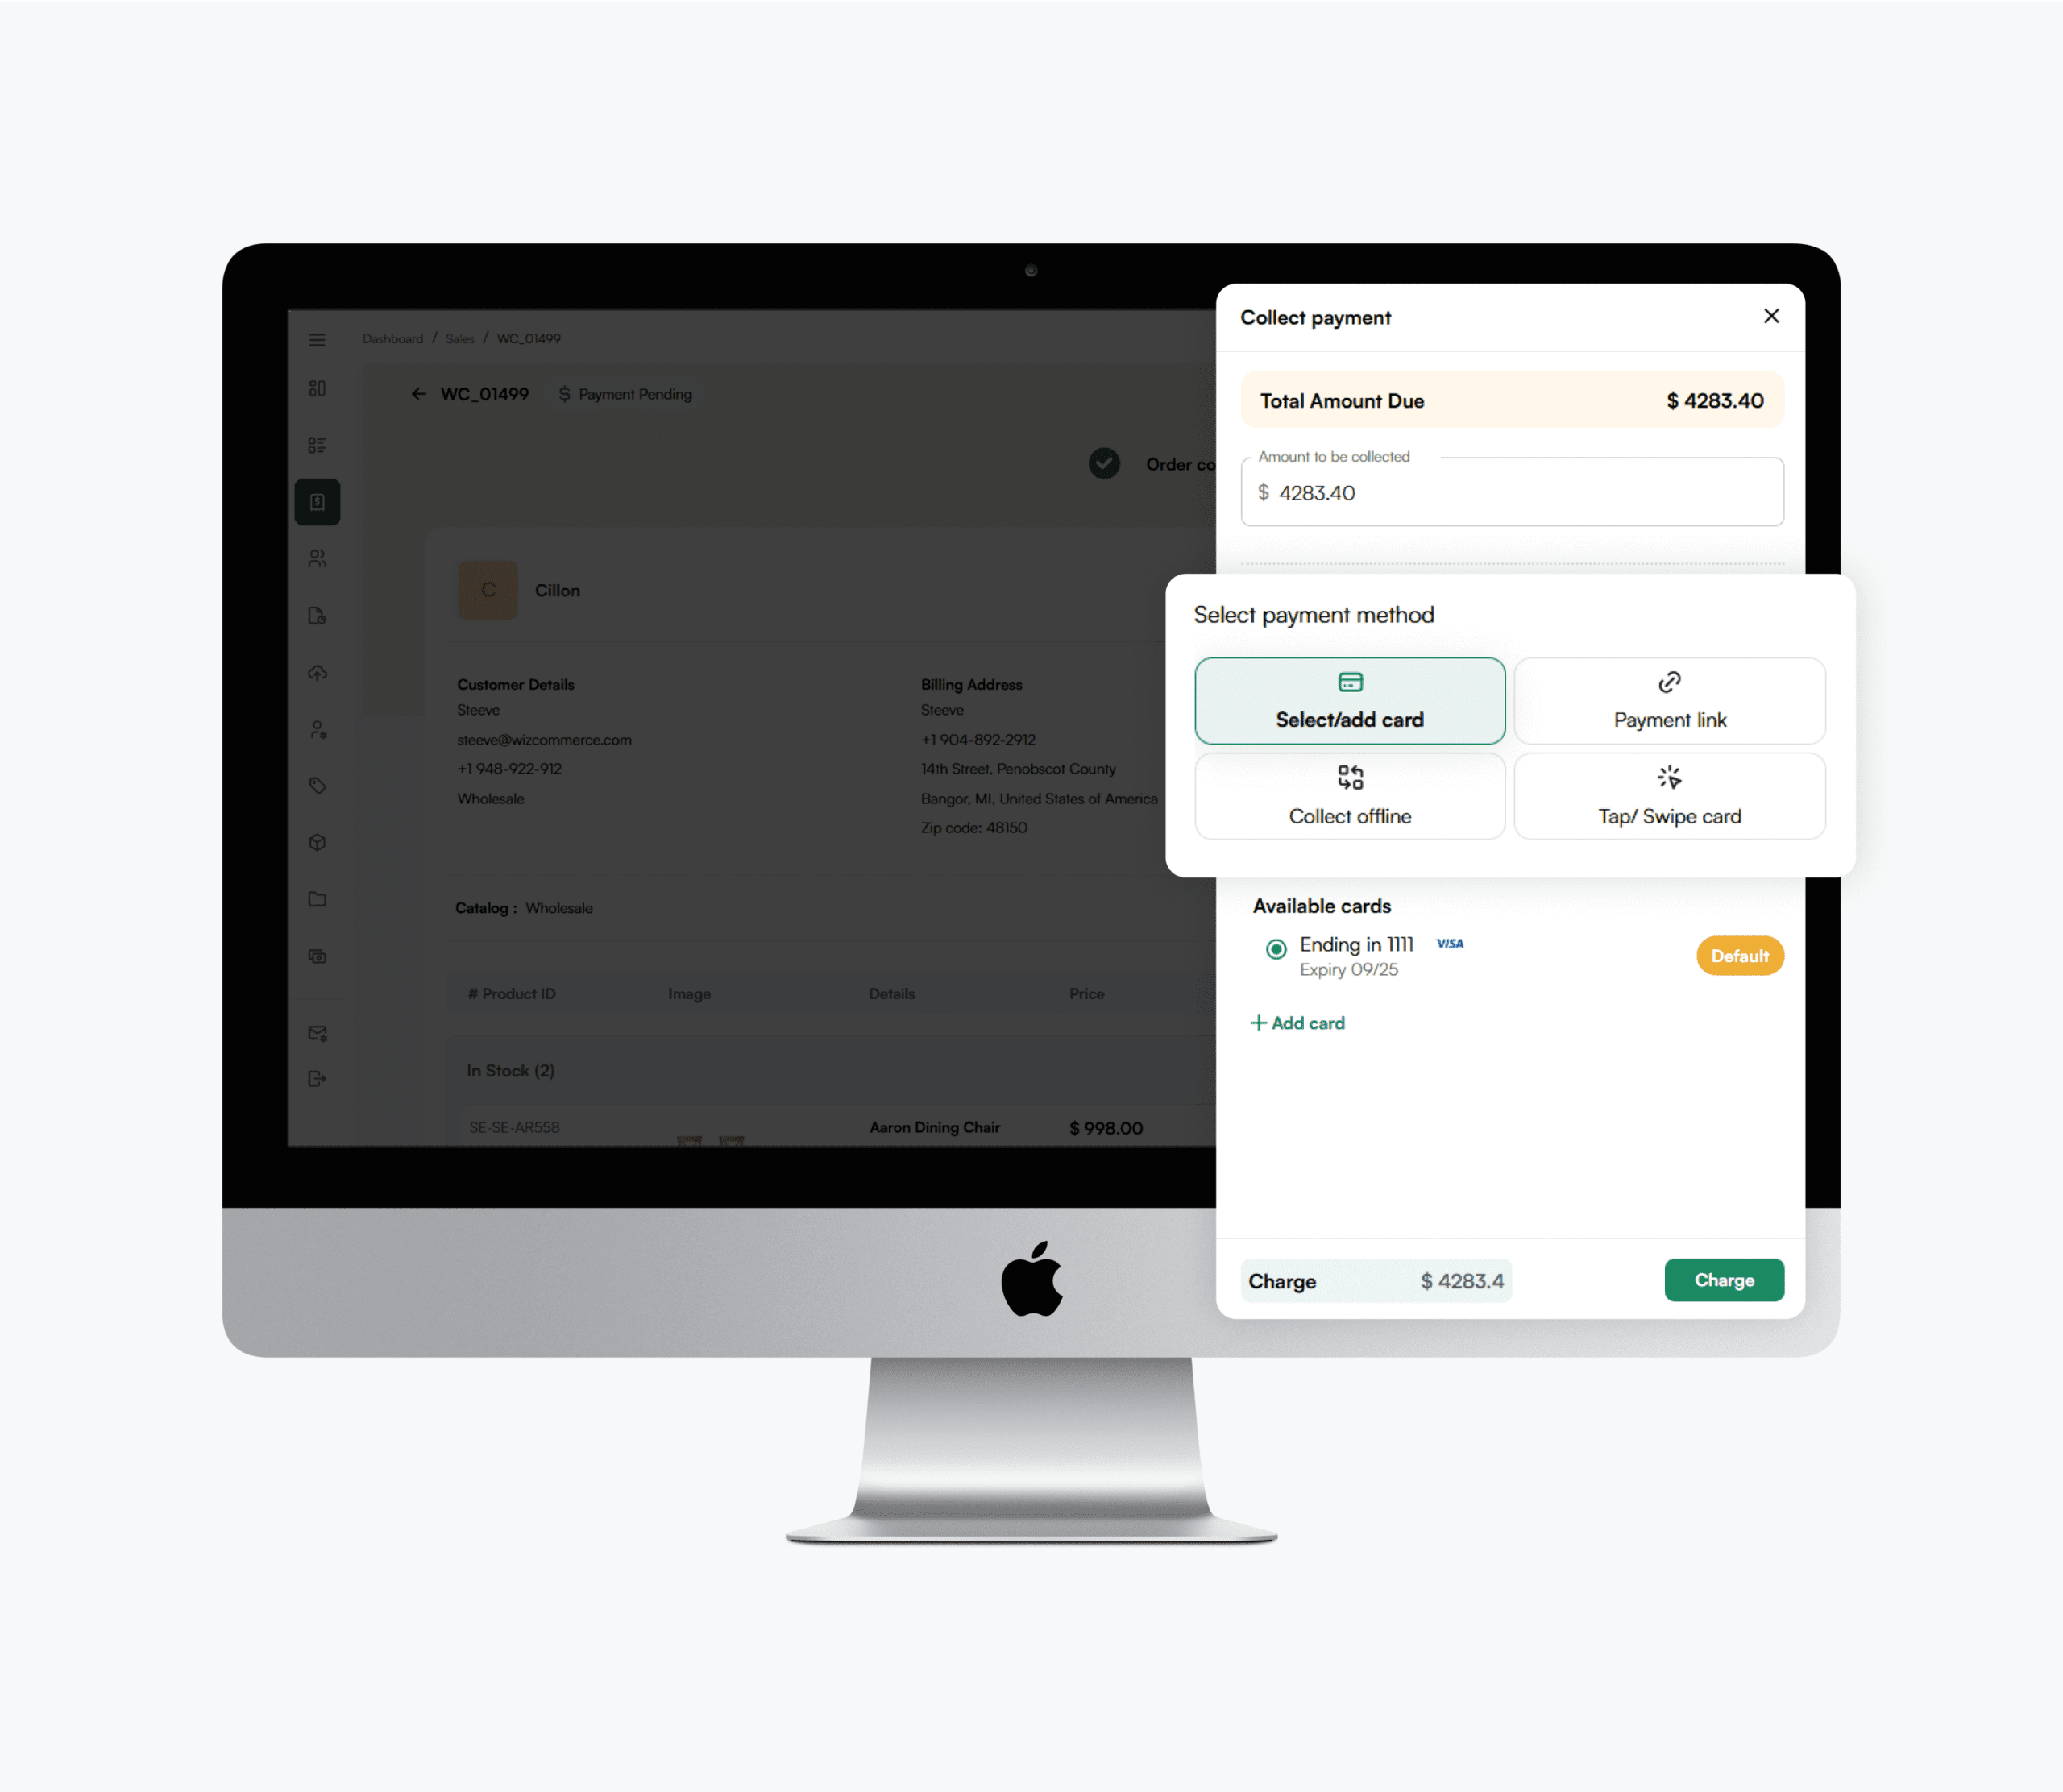
Now comes payment collection. Click “Collect payment” on the above screen. You will see this screen:
Here, you will see four payment collection options. Let’s understand these one by one.
The first option is “Select/add card.” We have already talked about this. If you click on this option, you will see the card we previously collected. You will also see the option to add a new card:
This option is handy if the customer is not with you in person and you want to collect their card details on phone. Or, if you already have their card details stored, you can simply charge it to pay for an order.
Supposed you want to charge the customer for $1500 out of the total amount via the collected card:
Simply enter the amount and click on “Charge.”
Done! Payment collected.
This transaction is recorded in your payment history along with the status, amount, payment method, time and date of the transaction, sales rep name, and collection mode. Collection mode says “Card on file” which means payment was collected through a saved card.
The second option is “Payment link.”
This option is handy when you don’t have the customer’s card details. With this method, you can email a customer a payment link. The customer can click on this link and make the payment themselves.
You can enter the amount you want to collect and the customer’s email address where you want the link sent:
Once you have entered the email address, click “+ Add email.” Then click “Send Link.”
The payment link is sent to the email address added along with order details and sales order form. This is what it looks like:
The customer can click “Pay now,” and they will be redirected to this screen:
Here, they can enter their card details themselves and make the payment.
The third option is “Collect offline.” If you are collecting payment for an order via check/cheque or the payments are processed through an ERP (any medium except WizPay), you can record it using this option.
Simply click on “Collect offline,” enter the amount that was collected offline, and select the method of payment:
Let’s say the payment was collected via a check. You can select “Check” from the dropdown, add the date of collection, and reference number (check number, notes, or any other kind of reference to the transaction).
Once done, click on “Save.” This payment will now appear in the order’s payment history with all relevant details:
The fourth option is “Tap/swipe card.”
This is when you want to collect payments in person (such as at trade shows.) We provide you with the hardware (physical device) to accept payments via card tap/swipe.
To use this option, simply select the terminal and enter the amount you want to charge:
Click “Charge.” The terminal gets the request for the amount you selected, and the customer can pay it by tapping/swiping their card.
Now comes the refund option:
Click “Refund.” You will see this dialog box:
Here, you will see the option to refund whatever transactions have been made for this order. Let’s say you have to refund the transaction for $1500 collected via the card on file. Select the amount you want to refund and the reason for the refund:
Then comes the option to “Refund to Source” or “Refund as Credits.”
If the customer wants a refund to the card from which the payment was made, you should select “Refund to Source.”
Alternatively, if the customer selects “Refund as credits,” the amount will be stored as credits, which can be used to settle payments against future orders. Let’s say you select “Refund as credits”:
Notice the current balance is $0 for this customer. Click “Refund.”
Click “Confirm.”
Now, when you click “Collect payment,” you will see the option to pay for an order with these credits:
Finally, we have “Add Credits.”
This option allows you to add credits to a customer’s account in advance. In this method, the buyer makes a payment, which is stored as credits and can be used to settle payment against an order. Credits can be added via any of the 4 payment methods we discussed earlier.


